Gourmet ice cream. We love the thickness, the supreme fattiness of the cream, and the way it clings to the spoon and coats your tongue as it glides down your throat. We love the 1002 flavours available, the exotic ingredients, and the posh names that have way too many words in it. But what we don’t love, as you are sure to agree with me, is the price tag that accompanies these delectable delicacies. A minimum of AUD$7 for 473mL/pint of gourmet ice cream? I don’t think so!
As with a lot of pre-made foods, I take issue with gourmet ice cream. The price is the biggest one I’ve got, $7-$15 for approximately 500mL of ice cream! Ugh! Highway robbery! The next issue is the ingredients. Have you looked at the ingredients section of your premium ice cream pint? Don’t let it’s creaminess fool you, it’s not as wholesome as it looks. I had a look at a couple of different brands, and it freaked me out a bit. 1 brand had 3 types of sugar in it (3 types; standard sugar, liquid sugar and corn syrup. And it didn’t say which type of corn syrup, the high fructose kind is a big no-no by the way!), and it had bi-carb soda in it! Why does ice cream need bi-carb? Seems a bit weird to me. Another brand was only 30% cream, and had 3 types of oil in it. 1 was coconut oil, that’s okay. The other 2 were palm oil and palm kernel. And I swear I saw the word ‘emulsifier’ mentioned a thousand times.
The scary thing is, this is the good quality ice cream. Imagine what the low grade stuff says. I’m too afraid to look. Give me homemade ice cream any day!
I’ve got a recipe for you that hasn’t got any scary ingredients, and it won’t require an ice cream maker. If you have one, you can use it but it’s not a must. You just need a bowl and some electric beaters, or a stand mixer. Nice and simple!
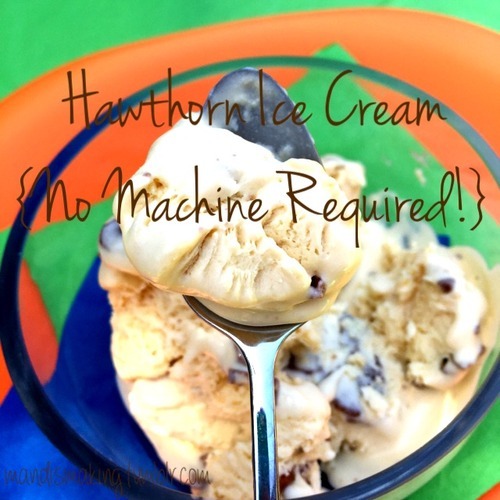
Let me tell you a bit of history about my ice cream. This was the very first ice cream I ever made, so it’s near and dear to me. My mum gave me the Family Circle “A Kid’s First Book of Cooking” book in my tweens (it’s a great cookbook, I still have it, and I’ve tagged a few recipes in it to remake and ‘Mandi-fy’. If you have a copy, dust it off and browse through it for some classic recipes!), and in it was a recipe for Hokey Pokey Ice Cream. I made it over the years according to the book, but as the book said it had to go in the fridge, it was like a really sweet thick mousse. Fast forward to 2008 when I introduced the recipe to the freezer, and I served it up as a frozen dessert at an AFL Grand Final lunch (if you don’t know what AFL is, you’re obviously one of my international readers. It’s a sport. Wikipedia it for more info!) at CTO’s bestie’s place. We nicknamed it ‘Hawthorn Ice Cream’ because it was brown and gold just like the team CTO and Firefighter (his bestie) support (the Hawthorn Hawks, if you haven’t caught it by now). The Hawks won, and the name has stuck since. And yes, I did make it for this Grand Final just gone, and if you don’t follow the game, yes, they did win.
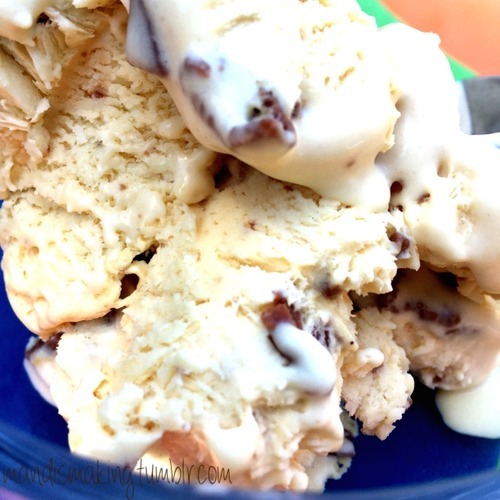
The recipe has been modified a bit since I first made it from the book, but I think this latest incarnation is the nicest. The Hawthorn Ice Cream has a condensed milk and cream base, with vanilla and chocolate coated honeycomb added as flavourings. And I’ve cut back some of the sweetness of the condensed milk with standard milk. Nice and simple, the weirdest ingredient is the honeycomb!
Like I mentioned earlier, you don’t need an ice cream maker. But if you have one, you’re welcome to use it. You’ll also notice with the recipe that you can use low fat or full fat milk and condensed milk in the ice cream. I’m all for lightening up ice cream, and I’ve noticed no difference in taste when I’ve used low fat. If you do go with low fat milk, you will have to use less. Less ice crystals in your ice cream that way. But please make sure that your cream is full fat, it won’t whip otherwise. Also, if you like your condensed milk ice cream ‘undiluted’, I’ve included a link to Best Recipes, which is where I used to post all my recipes waaaay before I even thought about blogging.
I really hope you all enjoy our family favourite as much as we do!
‘Hawthorn’ Chocolate Honeycomb Ice Cream
Time: 30 min, plus setting time (varies)
Yields: approximately 1-1.2Lt
- 600mL thickened cream
- ½ teaspoon vanilla essence
- 395g/400g tin of sweetened condensed milk, skim or full cream
- ¾ cup of light milk or 1 cup of full cream milk
- 100g chocolate coated honeycomb, crushed
- 3-4 drops yellow food colouring, optional
In a stand mixer or a large mixing bowl with electric beaters on high, whip the cream and vanilla essence together until soft peaks are formed.
Pour the condensed milk into the cream, then whip back to peaks. Add colouring if using it.
Set mixer/beaters to low, and slowly pour the milk in. Once incorporated, place mixing bowl in the freezer for 2-3 hours.
After 3 hours, take the ice cream out of the freezer and fold the crushed honeycomb through. Pour into moulds or a container and freeze until set.
If you have an ice cream maker, you can skip these last 2 steps and churn according to manufacturer instructions, adding the crushed honeycomb just before it’s set.
Adapted from “A Kid’s First Book of Cooking” and Good Housekeeping
Notes: If you’d like to try the original version of the Hawthorn Ice Cream, I posted it on Best Recipes a few years ago here. It’s a lot sweeter, and it’s got a lot more chocolate. Great for sugar comas!


3 Comments Add yours