How crazy has the whole “Frozen” phenomenon been? Even months after it’s been out, there is still so much merchandise out there, and every time I go out to my local shopping centre I see at least 2 little girls dressed up as Elsa. I don’t remember a Disney 2D movie being this popular since “The Lion King” 20 years ago, and that film never received as much attention as this one. Miss G is a bit too young for “Frozen”, she’s only 16 months and hasn’t got the attention span, but my niece Miss M who is almost 23 months is in love with Elsa. It’s very cute to hear her say “Ell-saaa!” I can see the appeal, I’m a big fan of Idina Menzel’s voice (Elphaba!), and I loved her in “Rent”. Not to mention, this is her 2nd time being a Disney Princess, remember “Enchanted”?

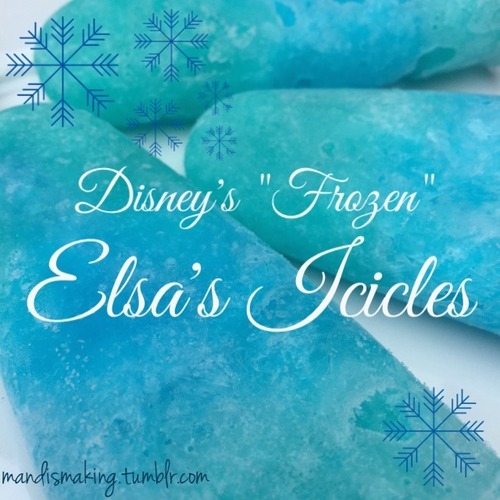
Knowing how much my nibblets (plural for niece and nephew! I have 1 of each!) enjoy the movie, seeing how hot the weather is going to get, and finding a lot of Jello popsicle posts on Pinterest… all these factors inspired me to create these pops. I’m rather pleased with how they’ve turned out. They look so crystalline and icy, and they mimic Elsa’s dress rather well. My sister in law Ms R said that they taste like a Sunny Boy. Can I get a better review than that?
Let me tell you the best bit about these pops. You might have the ingredients in the pantry already, just maybe not in these colours. If you didn’t get my clue in the above paragraph, you only need 2 packets of jelly crystals (and the standard boiling and cold water) in different colours to make these, plus a little bit of water, soda water or leftover lemonade. And depending on the size of your moulds, you could get 20-24 icicles out of 2 packets!
These can be a bit fiddly to make, but it’s mostly in the assembly. Once the jelly is made (separate bowls!), it’s left to cool then frozen until hard. You scrape shards of the frozen jelly, layer the 2 colours into your moulds, then fill in the gaps with water/soda water/lemonade, then refreeze. Be careful not to overfill with too much water though, the frozen jelly really sucks it ups like a sponge and once refrozen it expands quite a bit.
The blue jelly can be a bit fiddly to find. I was lucky enough to find 2 different colours in Aeroplane Jelly at Coles in Blue Heaven and Berry Blue flavours, though I believe the Lemonade flavour may have a slight blueish tinge to it, but don’t quote me on that! My local Woollies and IGA both have 1 colour of blue each. If you can’t get a hold of 2 kinds of blue, why not try it with the Create-a-Jelly, lemonade and food colouring or blue cordial, or just the regular Lemonade flavour with a few drops of blue colouring. And you’re not limited to just blue! Why not try them in other jelly flavours, or try and match Anna’s dress instead of Elsa’s?
I hope your little (and big) princes and princesses enjoy eating these crunchy icicles on the next hot day at your house. Watch out for sticky faces and fingers, and blue blue tongues!
Elsa’s Icicles
Time: 30 min, plus freezing time (varies)
Yield: approximately 24 icicles, depending on mould size
- 2 x 85g pkts jelly crystals, each a different shade of blue (I used Aeroplane Jelly Blue Heaven and Berry Blue)
- 500mL boiling hot water
- 400mL cold water
- Less than 1 cup of water, soda water, lemonade
In 2 separate measuring jugs or mixing bowls, dissolve each packet of jelly crystals in 250mL of boiling hot water. I usually use a whisk, as it dissolves a bit faster than a spoon. Once dissolved, stir in 200mL of cold water into each jug or bowl. Let them sit to room temperature, cover jelly with cling wrap then place in freezer or transfer liquid jelly into ziplock bags before freezing.
Once jelly has frozen, grab a dessertspoon and scrape away/break off pieces of blue ice (bashing at it with a rolling pin or mallet does not work, trust me) from 1 colour and fill your moulds approximately 1/3 of the way. Pack it down with your fingers or spoon. Repeat with your 2nd colour and fill another 1/3 of the mould. Pack it down, then go back and repeat with the 1st colour, and again pack it down.
Trickle a small amount of water/soda water/lemonade into each mould, then let it expand and rest. Add icy pole sticks and more liquid if required.
Freeze until solid.
Notes: Depending on the quantity of your moulds, you can do this in 2-3 batches. Just leave the frozen jelly in the freezer, and fill the moulds when they’re empty. Pull out your completed icicles, wrap each one in a square of baking paper (optional), then place them in a large ziplock bag or a big freezer bag with a clip.

One Comment Add yours